Your iPhone is your portal for almost everything. Users use it to communicate with friends and family, to document life with videos and photos, and to surf the web. You can use it to pay for goods and services and to manage your bank accounts. You read books, play games, watch videos or listen to music on it to spend time when you’re away from home. It’s amazing that a small device like an iPhone can do almost anything!
Surprisingly, your iPhone is useless when the battery runs out. I know it can be quite stressful when the battery turns down and there is no charger nearby. But do you know what is worse? When there is actually a charger available, but your iPhone charges slowly or does not charge at all.
Waiting for an iPhone to charge longer than the average is not fun. Having it connected to a charger for what seems like an eternity could mean missed appointments, unread messages and unanswered calls, not to mention the general anxiety caused by having an unreliable battery.

Before rushing for a repair shop to repair your iPhone, here are some troubleshooting tips to try first. Perhaps all that is needed is a little tender and extra care to speed up the charging sessions of your iPhone.
If your iPhone is not charging at all, Read this guide.
Easy fixes if iPhone charging slowly
Here are some simple methods that you can try to make your iPhone charge normally.
1. Check your cable
Think about it, your charging cable is likely to receive the most abuse among all its charging accessories. It stretches, bends, steps, twists, and knots all the time. It is usually the weakest link in its load chain and is the first point of failure, so I recommend checking it first.
If moving or twisting the cable solves the problem, there is definitely something going on with your cable. Check for frayed or bent areas. Charging cables are more susceptible to damage around the area where the cable is connected to the plug, so check if those ends are bent or out of shape.
Also, inspect your cable for bare sections where the internal cable is exposed. These can not only cause charging problems but also fire and electrical hazards.
If you have a cable that is not fit, replace it immediately, but make sure the replacement cable is an Apple certified product.

2. Check your charger
Next step, check your brick charger by plugging another device (another iPhone or iPad) preferably with a different cable and see if the device starts charging.
If your iOS device charges slowly, then your charger may have poor power to operate normally.
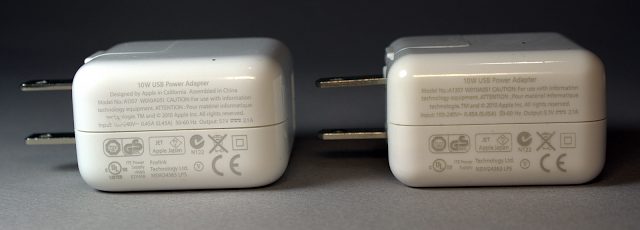
For example, iPad chargers, which have a power of 12W or 10W, will charge iPhones faster compared to the smaller default iPhone 5W charger.
However, the use of an iPhone charger or the USB port of a computer (the USB 1.0 and 2.0 ports of the computer are only 2.5W and USB 3.0 is 4.5W) to charge an iPad (or any other device) will be slower.
NOTE: Be careful with cheap and third-party imitation chargers due to current inconsistencies, and these can lead to overheating.
If there is nothing wrong with your charging brick (it normally charges other devices and has adequate power), continue with the next step, that is, clean the port of your iPhone.

3. Clean your port
The Lightning connector on your iPhone is not dust and lint proof. Although the port itself is very durable, lint and dirt can accumulate over time, especially if you carry your iPhone in your pocket all the time.
A common symptom of having a dirty port is inconsistency. If unplugging and reconnecting the cable works sometimes or if your iPhone connects and disconnects randomly, then it is a common sign that your charging port needs some cleaning.
First, tempting as it may seem, do not use compressed air to try to force dust and lint. In reality, this can aggravate the problem by pushing dirt deeper.
What you can do is get a toothpick with a round tip (the softer, the better), then simply remove all the dirt very gently. Use a flashlight to look for dirt if necessary. A small amount of alcohol on the tip of the toothpick can also work wonders to loosen compact dirt and lint.
You may have to blow gently into the port (the old trick of the Nintendo cartridges) from time to time to remove all loose dirt, but once everything is clean and pleasant, try plugging it in again and hoping for the best.

4. Use airplane mode
A good trick worth mentioning is that you can charge an iPhone a little faster by activating Airplane Mode, but I want to say a bit.
This happens because it turns off mobile data and Wi-Fi which uses less power while charging. Open the Control Center and touch the airplane icon when charging. Note that while Airplane mode is activated, you will not be able to answer phone calls or use your iPhone to surf the Internet, which result that the iPhone will charge a little faster.

5. Increase the Amperage
A low Amperage source can cause your iPhone to charge slowly. A normal iPhone ships with a 5v, 1A charger.
You can use a charger of 2.1A instead. It will make your iPhone charge faster. But make sure you don’t use any charger above that limit. You can either visit Apple store to get a new charger or buy it online. Make sure that you buy only certified chargers.
Many users infact use the iPad charger to charger their iPhones. An iPad charger will charge your iPhone considerably faster and yes it is 100% safe as well.
6. Power Cycle
Many users don’t let the iPhone battery drain and keep the iPhone plugged-in for most of the time.
It is really important that you let your iPhone’s battery drain out every once in a while. Don’t always keep your phone plugged in, rather let the battery drop down to 5-10% before charging it.
Also, every once in a while, drain the battery to 0% and charge it to 100% without using it.
Worst case: repair it
So you have performed all the previous steps, but unfortunately, your iPhone still charges slowly or does not charge at all. So, most likely, you have a hardware problem. It could be a defective battery or its internal plate are corroded or cracked.
In this case, contact Apple technical support for repair options. If your iPhone is still under warranty or has extended Apple Care + coverage, you can repair and replace it at no additional cost to you.

![How to use Snapchat on Mac [3 Methods] How to use Snapchat on Mac [3 Methods]](https://www.digitalcare.top/wp-content/uploads/2019/02/3-3-211x150.jpg)
![16 Best VR Apps for iPhone [Free VR Games] 16 Best VR Apps for iPhone [Free VR Games]](https://www.digitalcare.top/wp-content/uploads/2019/10/endspace-211x150.jpg)
