Many a times iPad users comes across the problem of Wi-Fi not being connected. Although iPad works well even without Wi-Fi in offline mode but we all like to have an internet connectivity to enjoy more of its features and stream online content.
It becomes very frustrating situation for iPad users when they are not able to connect to the home network. This could be due to various reason such as error in network setting or error in general settings of the iPad.
Sometimes the problems of connectivity could be due to router also which needs to be fixed so as to connect your iPad with the Wi-Fi. If you are not able to connect your iPad with your home Wi-Fi then this article will teach you different methods of connecting your iPad with the Wi-Fi and overcome your problem of not being able to use iPad in online mode.
Fix “iPad Not Connecting to Wifi” Problem
1) Reset network settings of your iPad
Many a times there is an error in network settings of your iPad which does not allow Wi-Fi to connect. This needs to be solved. In such cases you have to reset your network settings to factory defaults to remove such errors.
Follow below steps to reset your iPad network settings.
- Open settings
- Click on General settings
- Now click on reset your network settings.
- It will ask your passcode, enter it and confirm.
- Now you are iPad will reboot and reset your network settings.
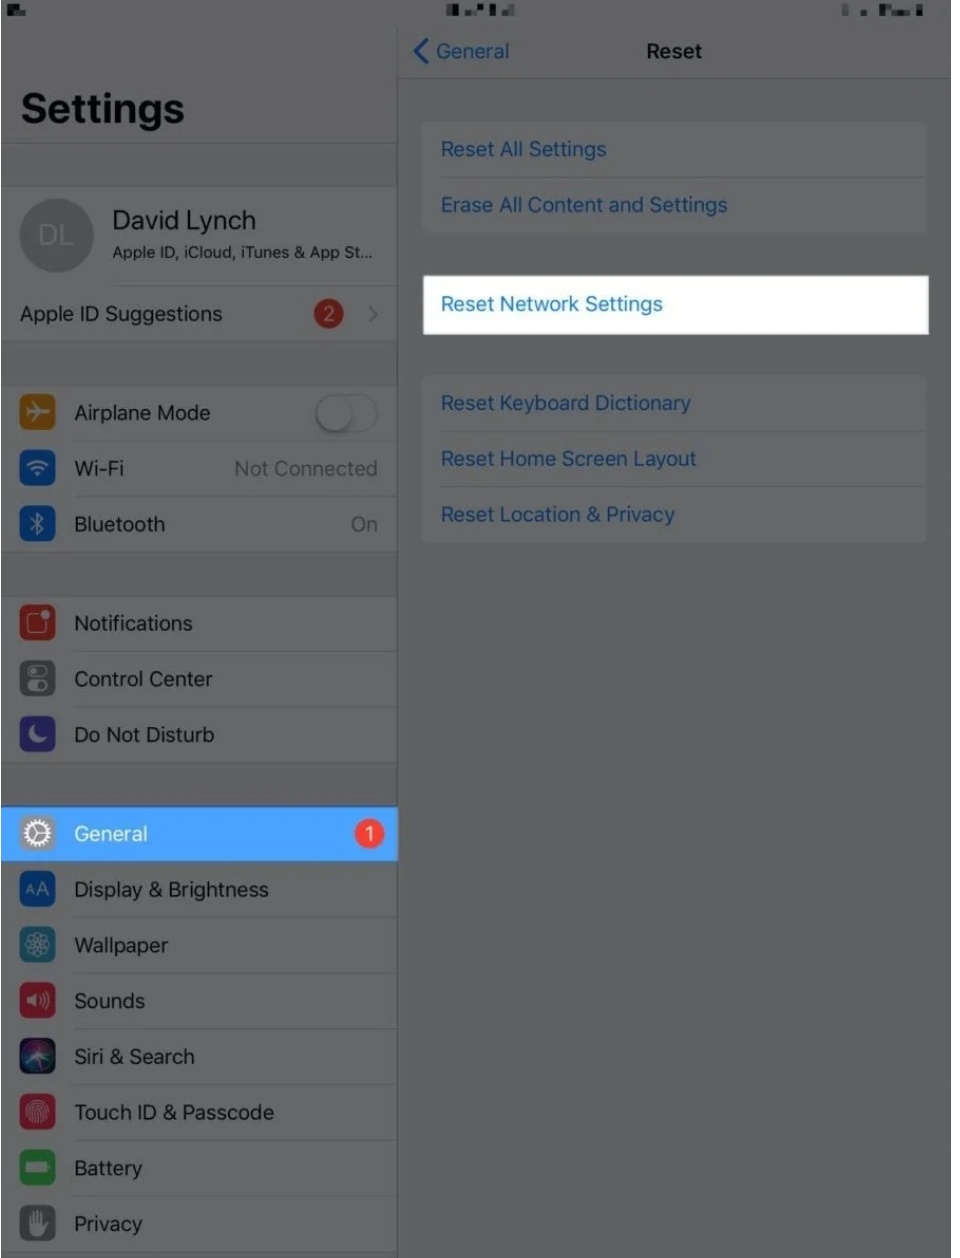
After resetting is complete you have to enter the Wi-Fi password again to reconnect.
2) Turn off and then Switch on your Wifi
Sometimes you do minor technical error your iPad is not able to connect with Wi-Fi. So in those cases try turning your Wi-Fi off and then turn it on after sometime. Steps to be followed are:-
- Go to settings
- Check your Wi-Fi whether it is on or off. If it is turned on then turn it off
- Wait for few minutes and then turn it on again to reconnect.
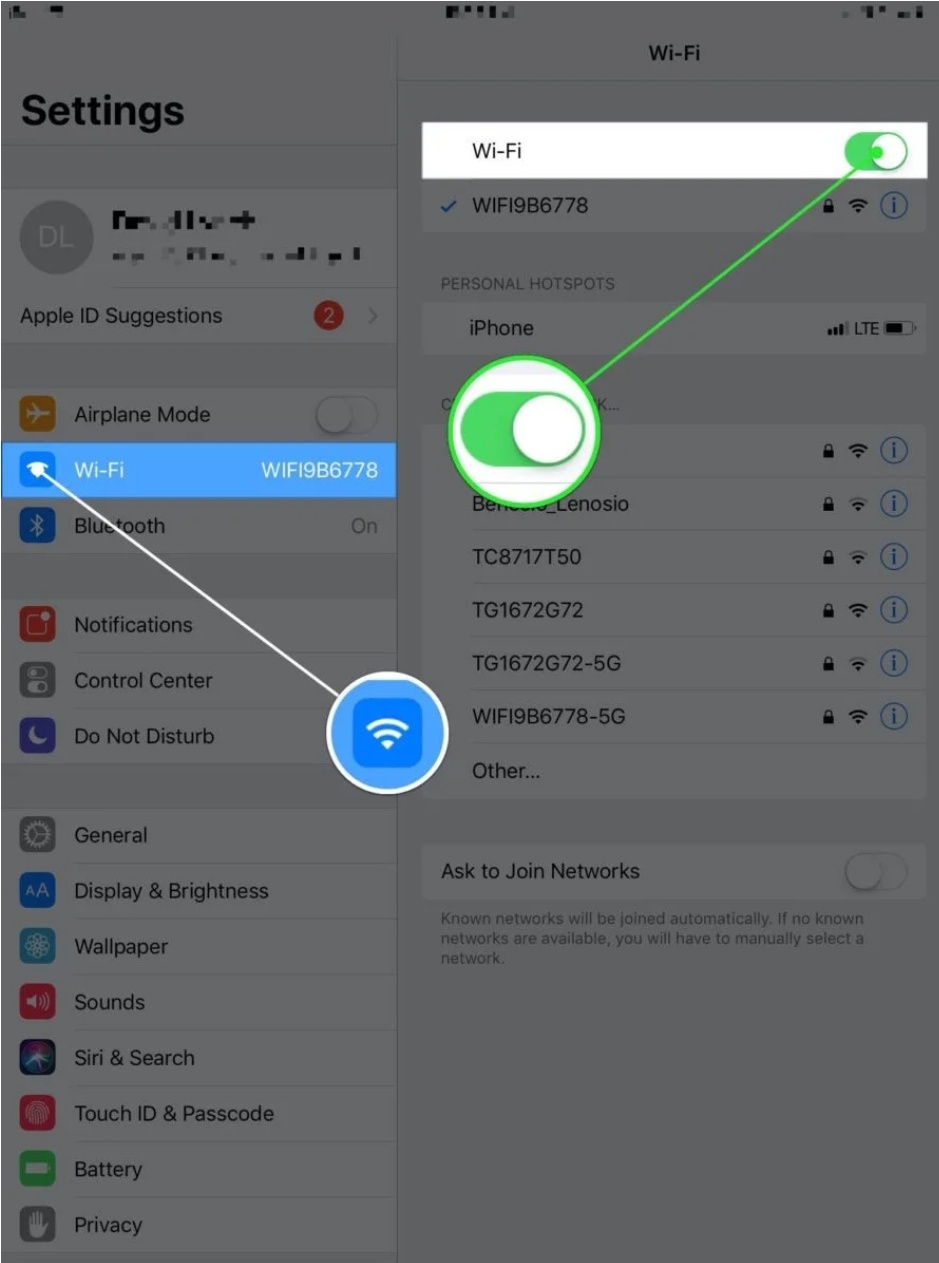
This will help to overcome the minor technical problem which did not allow iPad to connect to Internet. Thus your iPad will connect to your Wi-Fi network.
3) Restart your iPad
Sometime refreshing your entire device can help the iPad to connect with Wifi Internet. So in order to refresh the entire system you need to reboot and restart your iPad. Thus follow below steps
- Hold your top button
- Slider will appear to power off your device
- Slide it towards the right to shut it down.
- Now after sometime again hold your top button to restart your iPad.
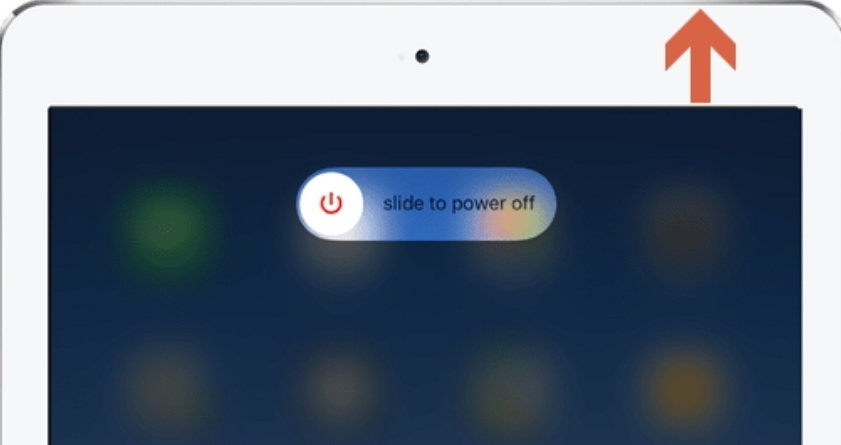
This will refresh your entire system and can help you to connect your iPad with your Wi-Fi.
4) Airplane mode
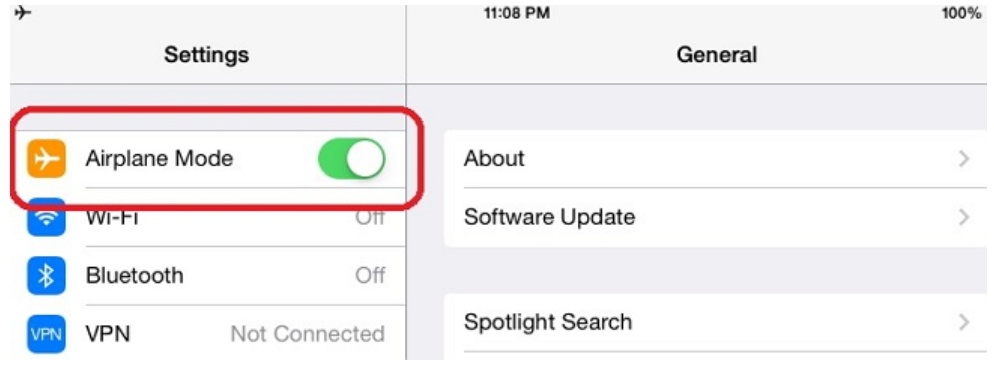
Another popular and simple method which could help you to connect your iPad with your Wi-Fi is the use of airplane mode. All you have to do is turn on your airplane mode and turn it off after few seconds. Although this method is less effective but however it has solve the network related problems in many cases.
- Go to settings
- See whether airplane mode is on or off
- Turn it on if it is off
- After sometime turn it off again.
5) Forget your current Wi-Fi network and reconnect
Sometimes connection between your iPad and WiFi is tempered due to software bug. Therefore to remove the suspect you need to forget your Wi-Fi network and rejoin it after putting its password again. Follow these steps to forget and rejoin your Wi-Fi network.
- Open settings.
- Click on Wi-Fi.
- No there will ‘i’ next to your Wi-Fi. This small ‘i’ means info, click on it.
- Now on top you will see forget the network click on that to forget it.

- Now your Wi-Fi network will be seen under the main list of available Wi-Fi nearby.
- Enter the password again to to reconnect it.
This another good method which will help you to connect your iPad with your wireless network.
7) Reboot your router
The problem is not always with the WiFi it could also be due to technical errors in your router. So in such cases it is router which is to be blamed for improper connectivity.
Therefore switch off your router and turn it on after sometime to remove the minor technical error. All you have to do is unplug it and plug it after sometime.
8) Update to latest version
Outdated iOS version bring many problems to your device and does not allow it to perform many of its features properly. Thus outdated iOS version can also be a reason for your iPad not be able to connect to Wi-Fi.
In such cases it is necessary to update your iOS with the latest version. To do that follow the below steps
- Open settings
- Go to general
- Click on software update and check whether an new update is available or not.
- If update is available then click on download and update to update your iPad with latest version of iOS
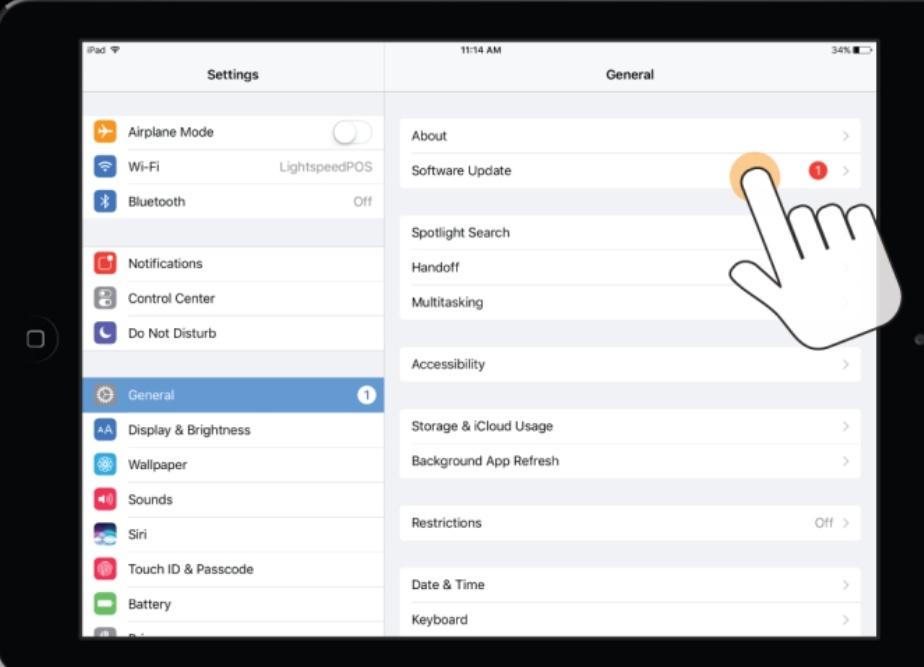
- Once the update is downloaded install it by clicking on install. Your device will then install it and reboot automatically.
If the problem of iPad not connecting to WiFi is caused due to outdated version of iOS then updating to the latest version may help you to overcome that.
Conclusion
Problem of iPad not connecting to WiFi is one which none of us will like to have. So if you are stuck in this problem then you can try above methods to make sure your iPad gets the connectivity back.
All the above methods are simple to apply. Even after applying all the above methods your iPad does not connect to Wi-Fi then it means there is some internal problem and make sure you repair it at nearby service centre. Hopefully various methods explained in this article will help you to come your problem of iPad not connecting to WiFi.

![iPhone Yellow Battery Bar Explained [Easy Fix] – 2024 Guide iPhone Yellow Battery Bar Explained [Easy Fix] – 2024 Guide](https://www.digitalcare.top/wp-content/uploads/2019/09/Battery-Yellow-211x150.jpg)
