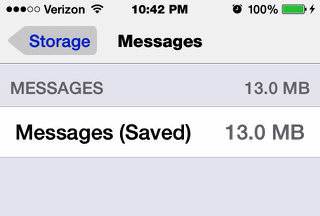
If you are an iPhone user, it is quite possible that storage space is one of the major concerns for you. A problem that contributes to this issue of lack of storage space is indeed, saved messages. Your iPhone sometimes mysteriously saves some messages. You may not voluntarily be saving these messages, but some bug is responsible for saving some messages on your iPhone. This bug just automatically saves some messages. To find out if this is happening on your device, go to Settings, then General and then Usage.

As shown in the picture above, the storage occupied by your saved messages will be displayed. It is usually in MB’s but some users have complained that the figure has also reached a number in GB’s. If it takes up so much of your space, it is a good practice to delete these sometimes unwanted saved messages. If you want to find out how to delete saved messages on iPhone, this is the article for you!
How to Delete Saved Messages on iPhone?
In this article, we will discuss two methods that will assist you in deleting saved messages on your iPhone. Go ahead and find one that is the most applicable for you and free up your storage space!
Method 1: Using Settings
This is an extremely simple method and will be completed in a matter of a few taps and a few seconds without using any external application. To do this:
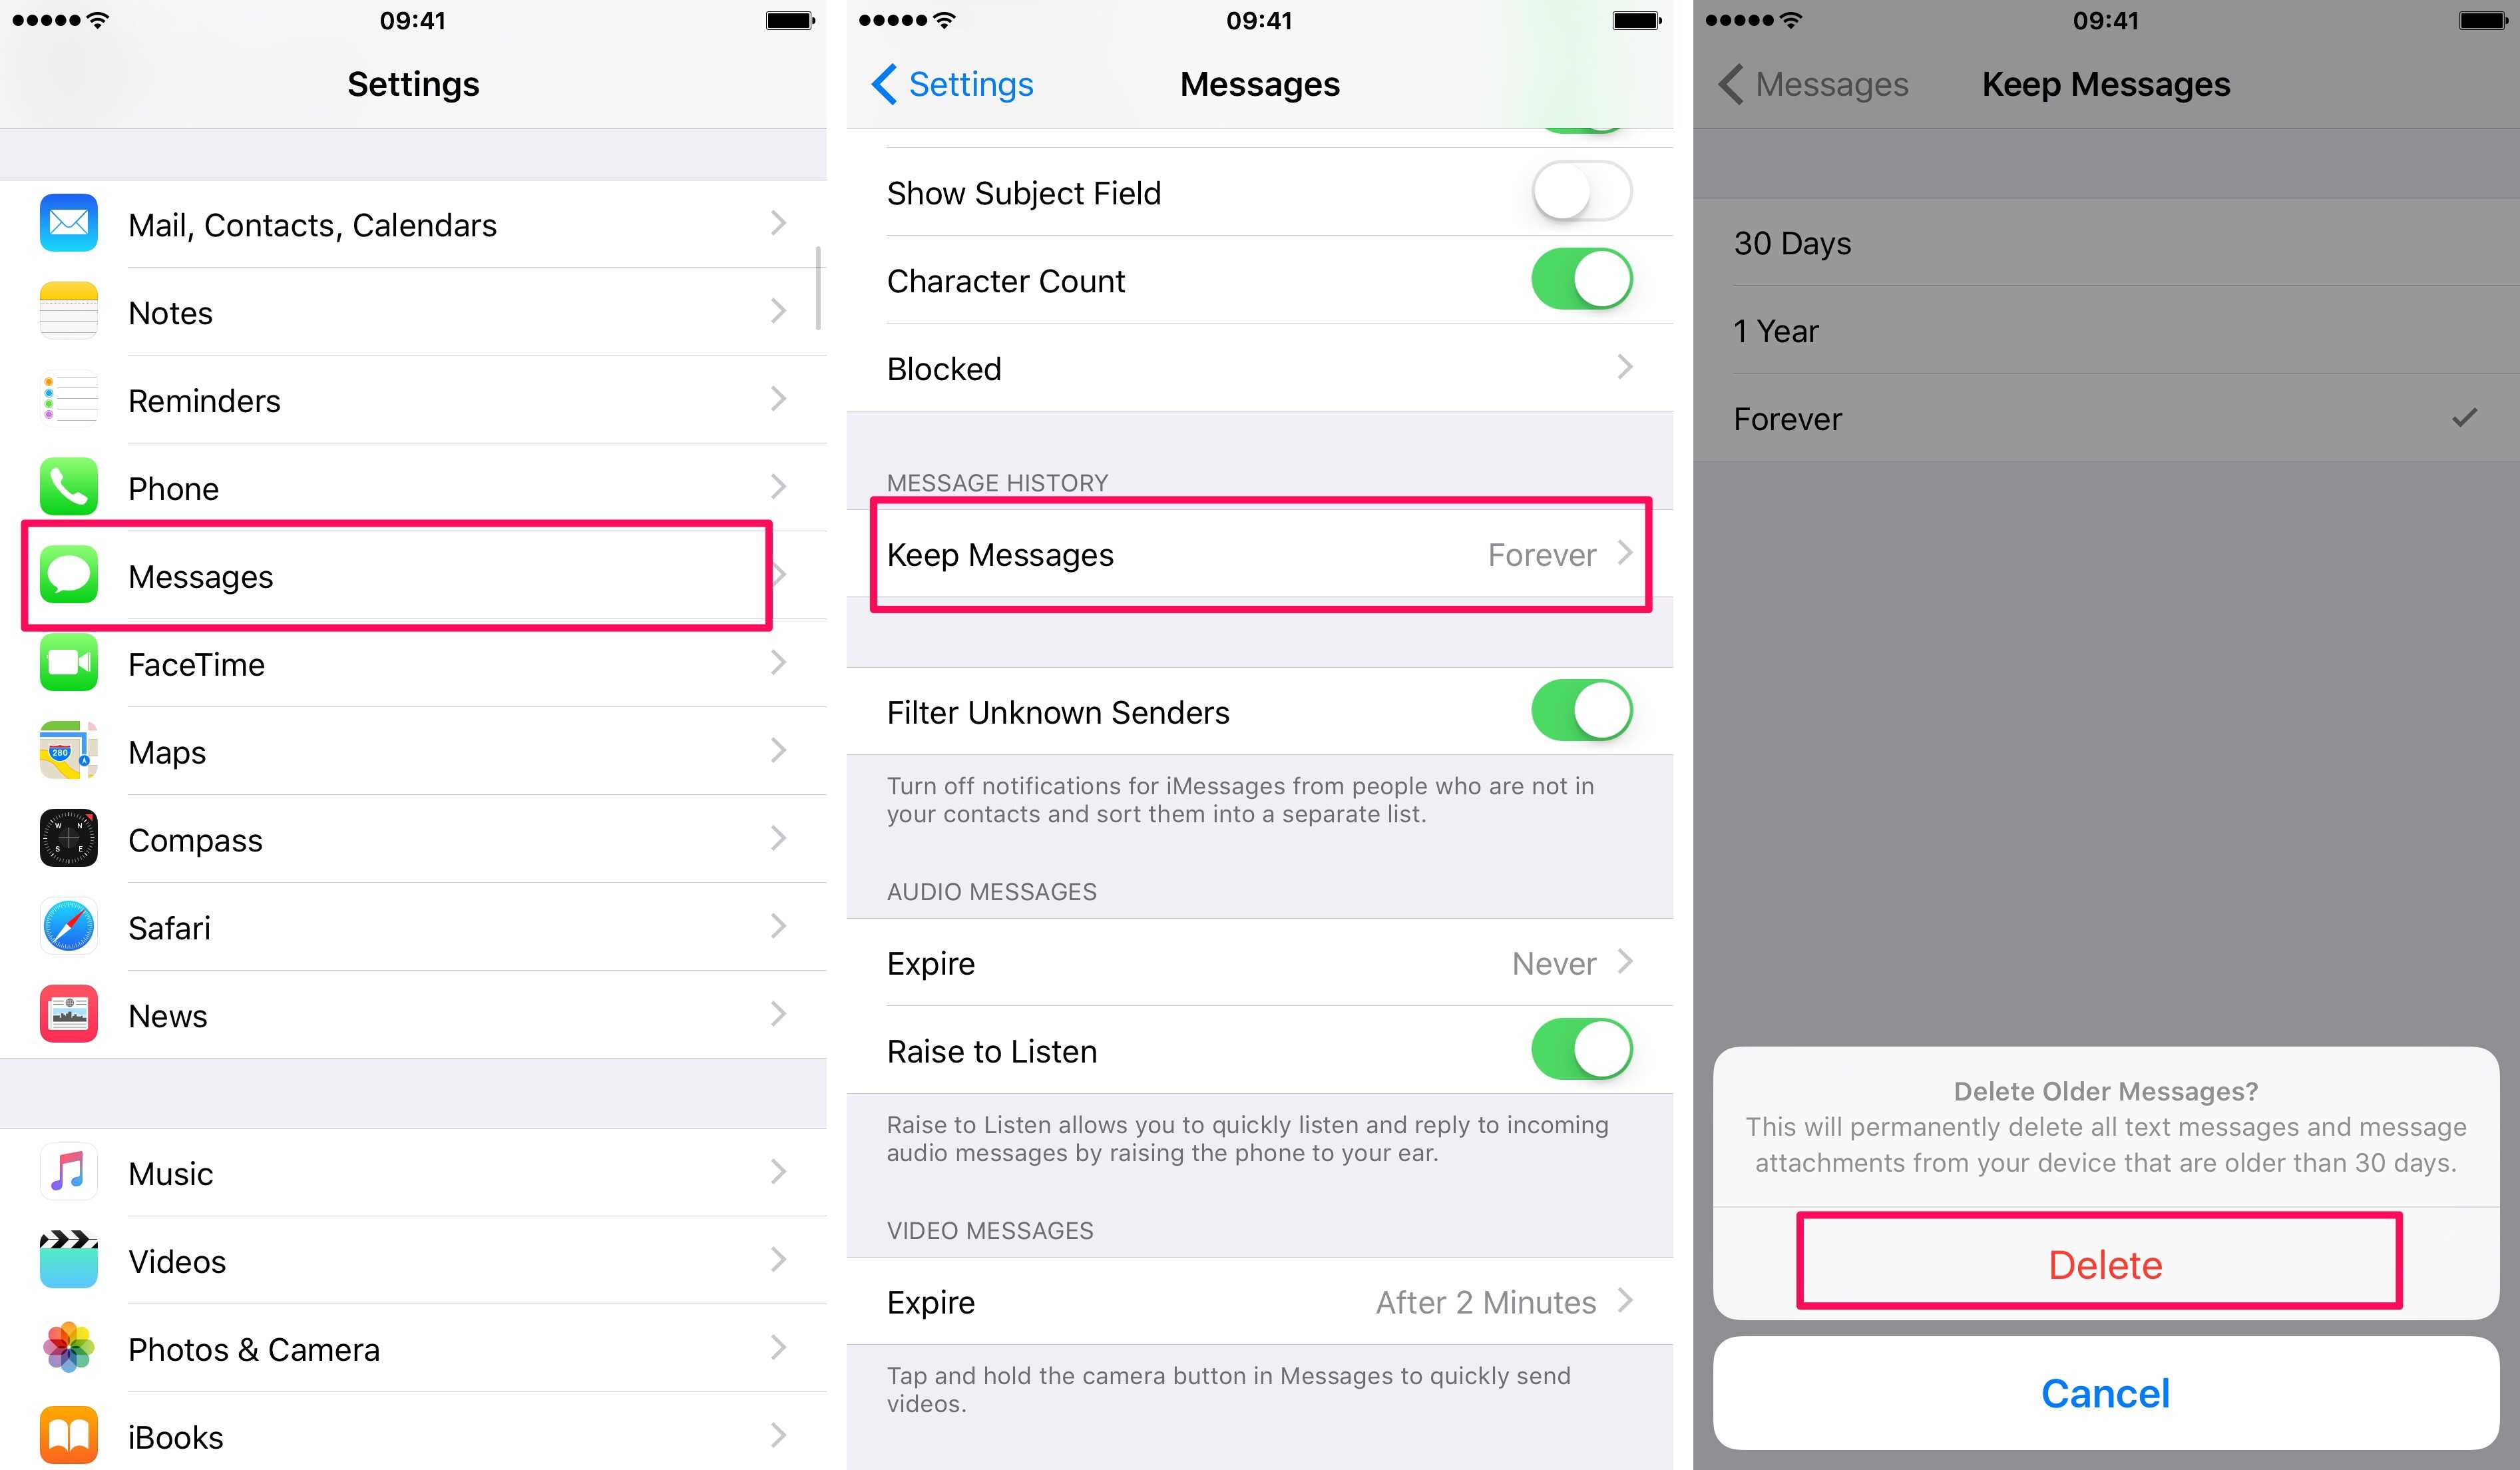
- Open Settings.
- Tap on Messages.
- Select Keep Messages.
- A list of options will appear. You must choose ’30 Days’.
- A pop-up will appear. This pop-up states that all messages older than 30 days would get deleted. Select ‘Delete’ to proceed.

Method 2: Using iBackupBot
This is a more complex process. It will be more time-taking and involves the usage of a third-party application. Even though it might take a longer time, it has the benefit of being able to delete all the messages at one go. Therefore, it can be used in order to quickly free up storage space on your device. Here’s how we can use this method:
- Download iBackBot on your computer.
- Set up the Application by following the built-in wizard on iBackBot.
- Connect your iPhone to your Computer using the USB Cable.
- On your Computer, open iTunes.
- Use the iTunes application in order to Backup your iPhone to the computer.
Now that we have successfully backed up our data on the Computer, it is time to begin the main process. Now, follow the steps mentioned below in order to remove all messages from your iPhone using this application- iBackBot.
- Launch the application on your computer. This launching process includes an initial scan conducted by iBackBot. Then, it finds the backup that we previously took.
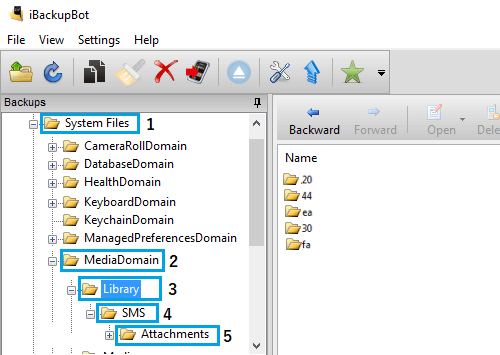
- Now, you must go to the Attachments folder. This would be present in your recent iPhone backup. To go here, follow the following path: System Files/ Media Domain/ Library/ SMS/ Attachments. Look at the picture below for assistance, if needed!

- Towards the right of the iBackBot screen, you would be able to find several folders having different names. These are the folders that hold all your saved messages and hence, hold a significant amount of your storage space. These folders mostly contain many pictures which include the ones you have sent or received while conversing with someone using social media!
- Select all the folders.
- On the top menu, you will find a ‘Delete’ option. Click on that.
- A pop-up confirmation will appear. Select ‘delete’ in order to delete all the messages and the attachments present.
Now that we have followed these steps, it is time to restore the backup we previously took. This is the last step that must be followed in this extensive procedure. This is how to go about that:
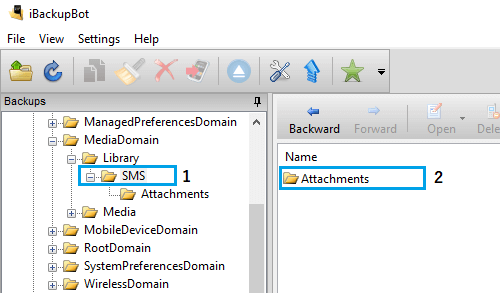
- Select SMS. This option would be available to you on the sidebar menu of iBackBot.
- Tap on Attachments. This will be visible on the right-hand side of the iBackBot screen.

- Click on the Restore button as shown in the picture below.

- This will cause a pop-up to appear that will consist of three restore options. You must ensure that you select ‘Reboot after Restore’ and ‘Don’t copy backup’ while you uncheck the option ‘Remove items from device that will not be restored’.
- Select ‘OK’.
Following one of the two methods will easily help you delete saved messages and free up your storage space. You must keep in mind that following these methods do not ensure that all traces of your conversation would be removed. These are safe methods but you must remember to take backups of your data before simply removing it. You may use iTunes for the same and the job will be easily done!

![Download Wine for Mac [Full Guide to Use it] – 2024 Guide Download Wine for Mac [Full Guide to Use it] – 2024 Guide](https://www.digitalcare.top/wp-content/uploads/2019/05/mac-211x150.jpg)

